
The Ultimate Guide: How to Groom a Dog at Home Step by Step
Grooming your dog at home involves bathing, brushing, nail trimming, and ear cleaning in a systematic order that keeps your pet comfortable, reduces mess, and lets you spot health issues before they become serious.
Why Grooming Your Dog at Home is Important
Regular at‑home grooming does more than keep your dog looking tidy; it directly supports skin health, minimizes shedding, catches early warning signs, and saves you money. When you brush a dog’s coat, you distribute natural oils that moisturize the skin and create a glossy finish, which helps prevent dry patches and hot spots. A consistent brushing routine also removes loose hair, reducing the amount of fur that ends up on furniture and clothing.
Shedding can be a major nuisance, especially for double‑coated breeds. By removing dead hair before it falls out, owners typically notice a measurable drop in overall hair loss. PawVortex’s 2025 guide highlights that using just four essential grooming tools—a slicker brush, a metal comb, a nail trimmer, and a gentle shampoo—can dramatically cut the volume of shed hair in a typical week.
Beyond aesthetics, grooming is a practical health‑check. While you brush, you can feel for lumps, bumps, or parasites that might otherwise go unnoticed. Ear canals, which are prone to wax buildup and infection, become easy to inspect when you clean them regularly. Nail length is another red flag; overgrown nails can cause gait issues or joint pain. Spotting these problems early means a quicker veterinary visit and often a less expensive treatment.
Finally, doing the work yourself eliminates the recurring fees charged by professional groomers. A basic grooming kit costs a fraction of a single salon visit, and the time saved on appointments can be redirected toward playtime or training. Over a year, the cost difference can add up to several hundred dollars, especially for larger dogs that require more product and longer sessions.
In short, home grooming is a win‑win: healthier skin and coat, less shedding, early detection of medical concerns, and a healthier wallet.
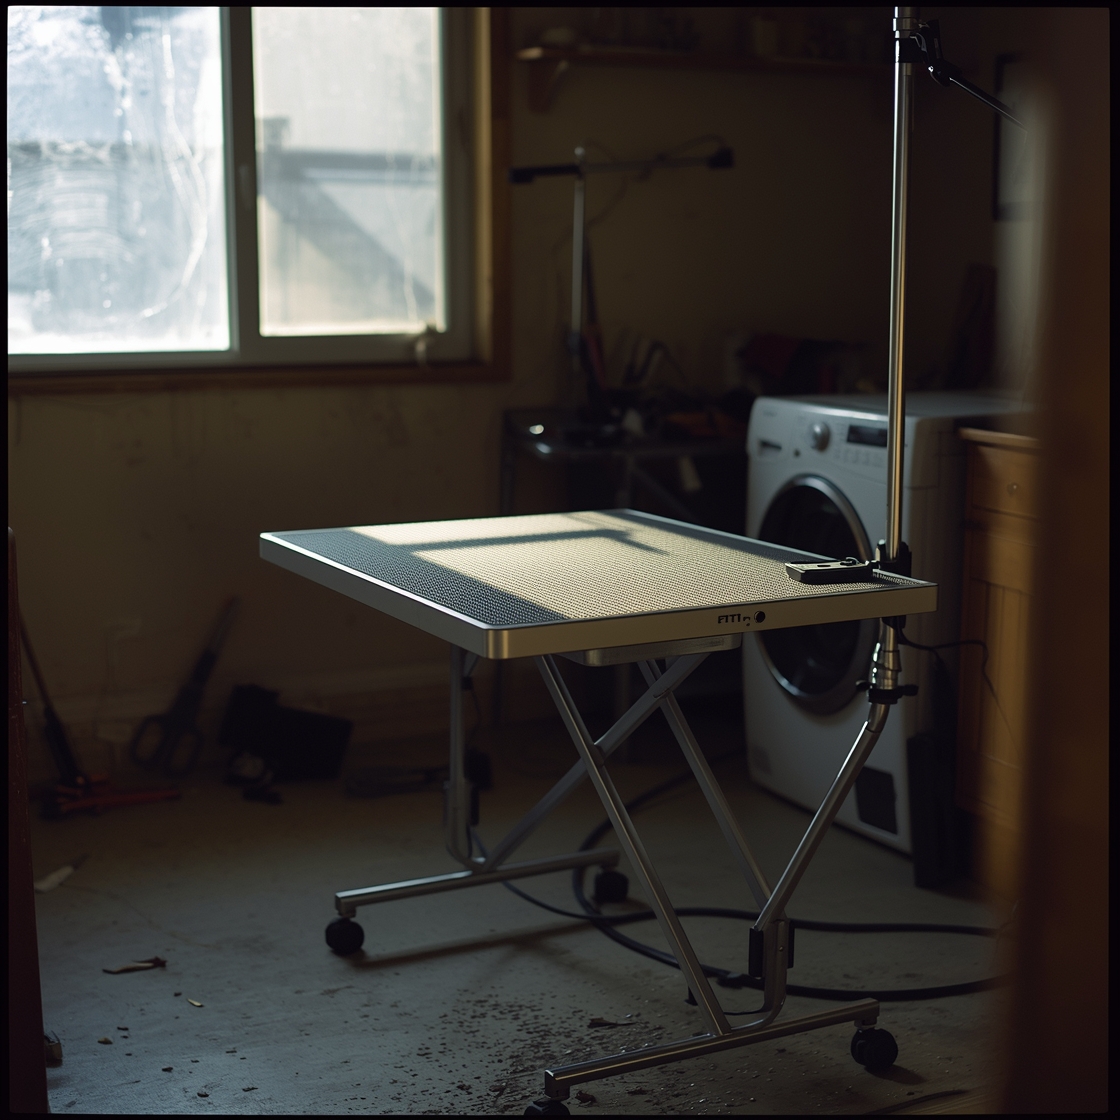
Essential Tools for Dog Grooming at Home
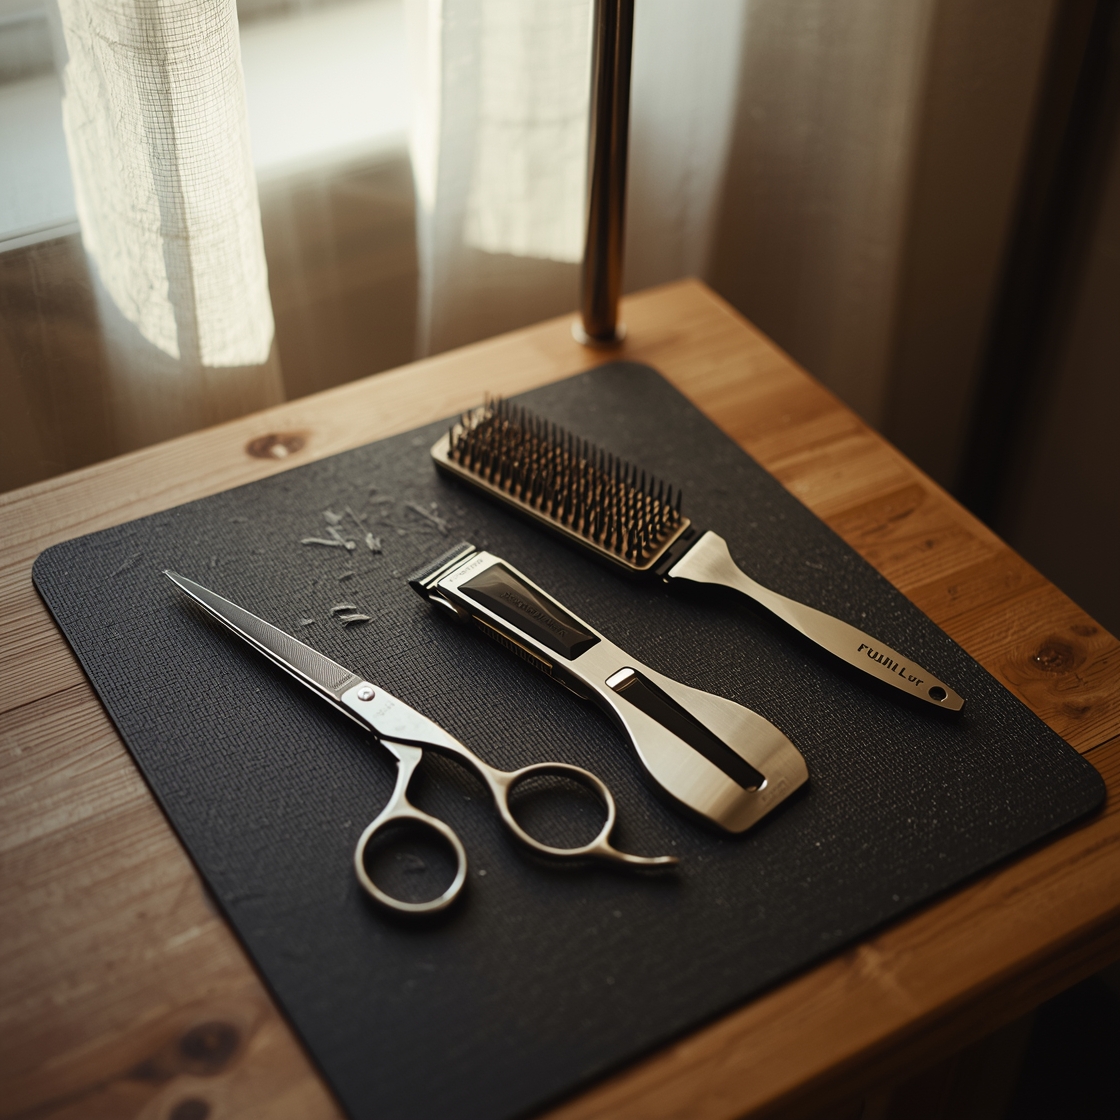
A well‑stocked grooming kit doesn’t have to be expensive, but it should include the right tools for each part of the job..com outlines three core categories of equipment every beginner needs: a brush or comb for the coat, a nail‑trimming device, and a bathing product. Adding a dedicated de‑shedding tool rounds out the set and helps keep loose hair off your furniture.
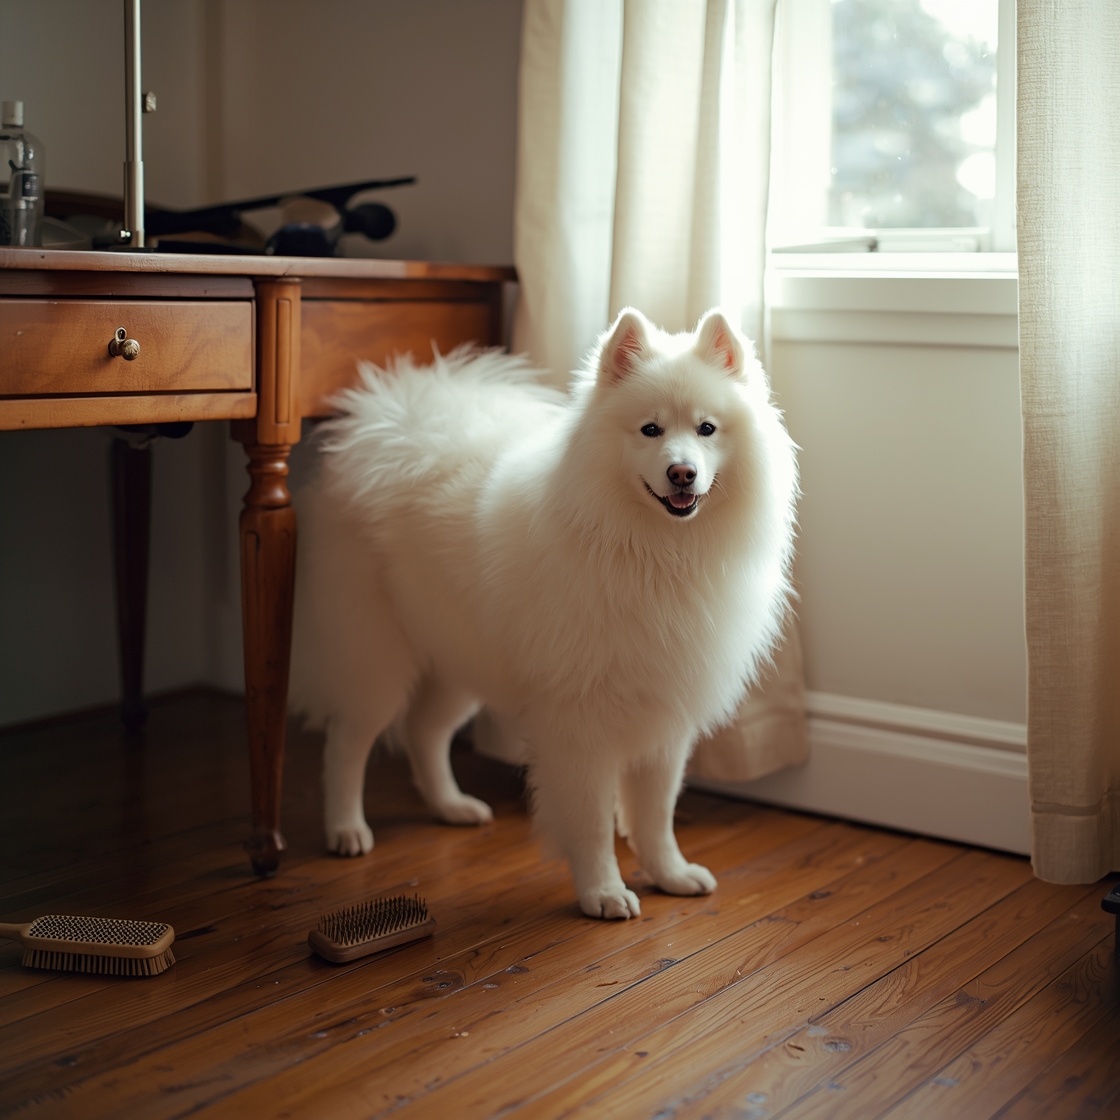
Brushes and combs for different coat types – Dogs with double coats, such as retrievers or huskies, benefit from a slicker brush that can work through the undercoat without pulling. Short‑haired breeds like beagles respond well to a bristle brush that smooths the outer layer. Long‑haired dogs, such as spaniels, often need a combination of a pin brush and a metal comb to detangle knots. Using the appropriate dog brushes and combs reduces matting and distributes natural oils, which promotes a healthier shine.
Nail clippers and grinders – Overgrown nails can cause discomfort and even joint issues. Guillotine‑style clippers are easy for most owners, while scissor‑type cutters give better leverage on larger paws. For dogs that are nervous about the “snip,” a low‑speed electric grinder can smooth the tip without the sudden shock of a cut. Many groomers recommend trimming a little each week to avoid the need for a full‑size trim every few months.
Shampoo and conditioner – A mild, pH‑balanced dog shampoo protects the skin’s barrier while removing dirt and odor. If your pet has a sensitive coat or allergies, look for a hypoallergenic formula free of harsh fragrances. Adding a conditioner, especially for curly or long coats, helps prevent tangles and makes brushing easier after a bath.
Deshedding tools – Seasonal shedding can leave your home covered in fur. PawVortex’s 2025 guide highlights four essential grooming tools, including a de‑shedding glove or a stainless‑steel rake designed to reach the undercoat without damaging the top layer. Regular use of a de‑shedding tool can cut the amount of loose hair by up to half, according to the same source, making weekly grooming sessions far more manageable.
Step-by-Step Dog Grooming Guide
A quick answer: start with a thorough brush, follow with a lukewarm bath, trim or grind the nails, then finish by cleaning the ears. Doing each step in this order keeps the coat loose hair from clogging the ears and reduces the risk of slipping on a wet floor.
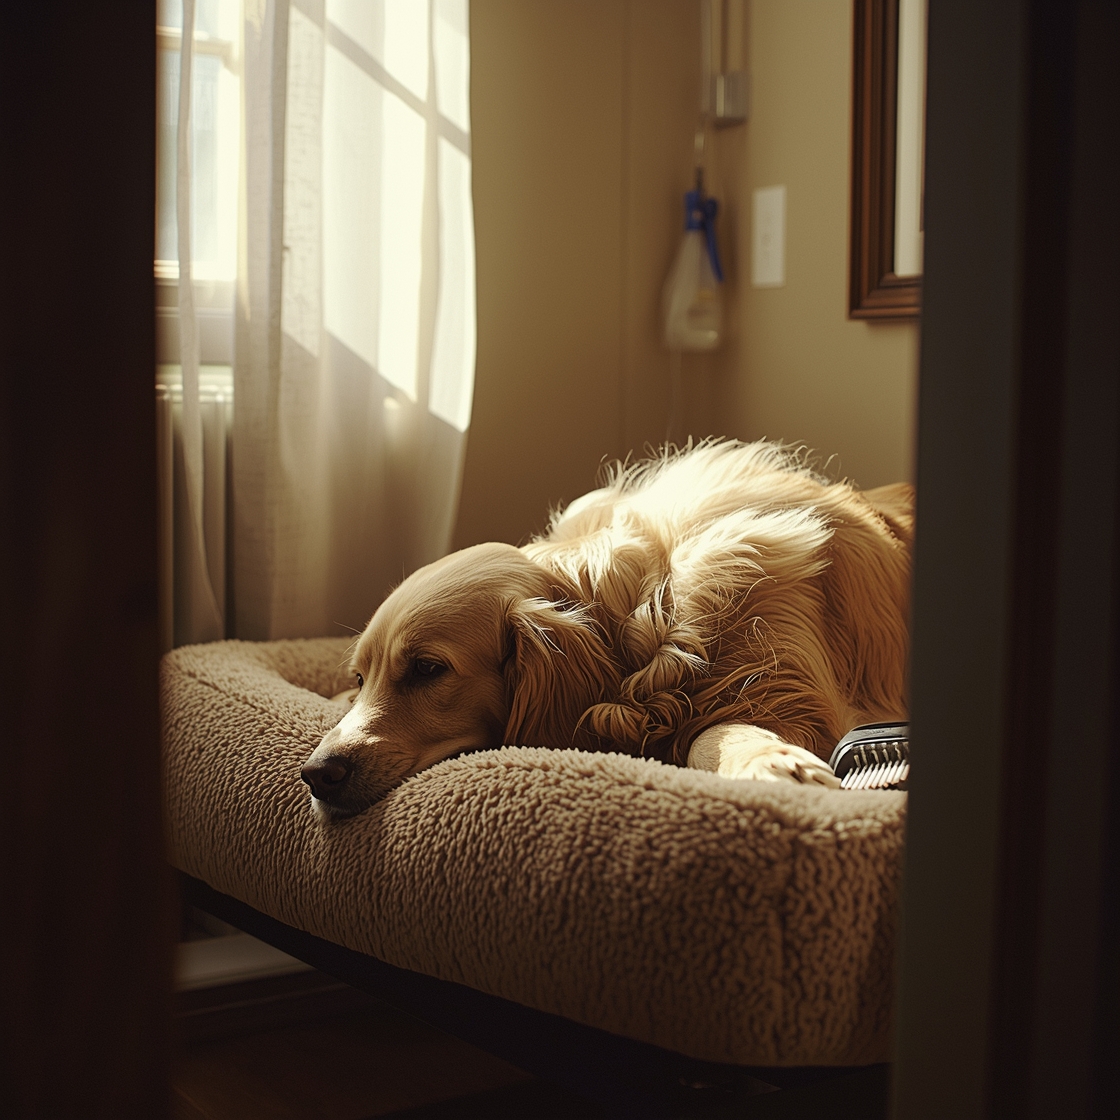
1. Brushing and Deshedding
Begin by selecting a slick‑brush or a metal de‑shedding tool that matches your dog’s coat type. For short‑haired breeds a soft‑bristle brush is enough; double‑coated dogs benefit from a steel‑comb de‑sheder. Work from the neck down, using long, gentle strokes to loosen dead hair before it mats. PawVortex reports that brushing twice a week can reduce visible shedding by roughly one‑third, so a consistent schedule makes a noticeable difference. Finish each session by inspecting the skin for redness or parasites.
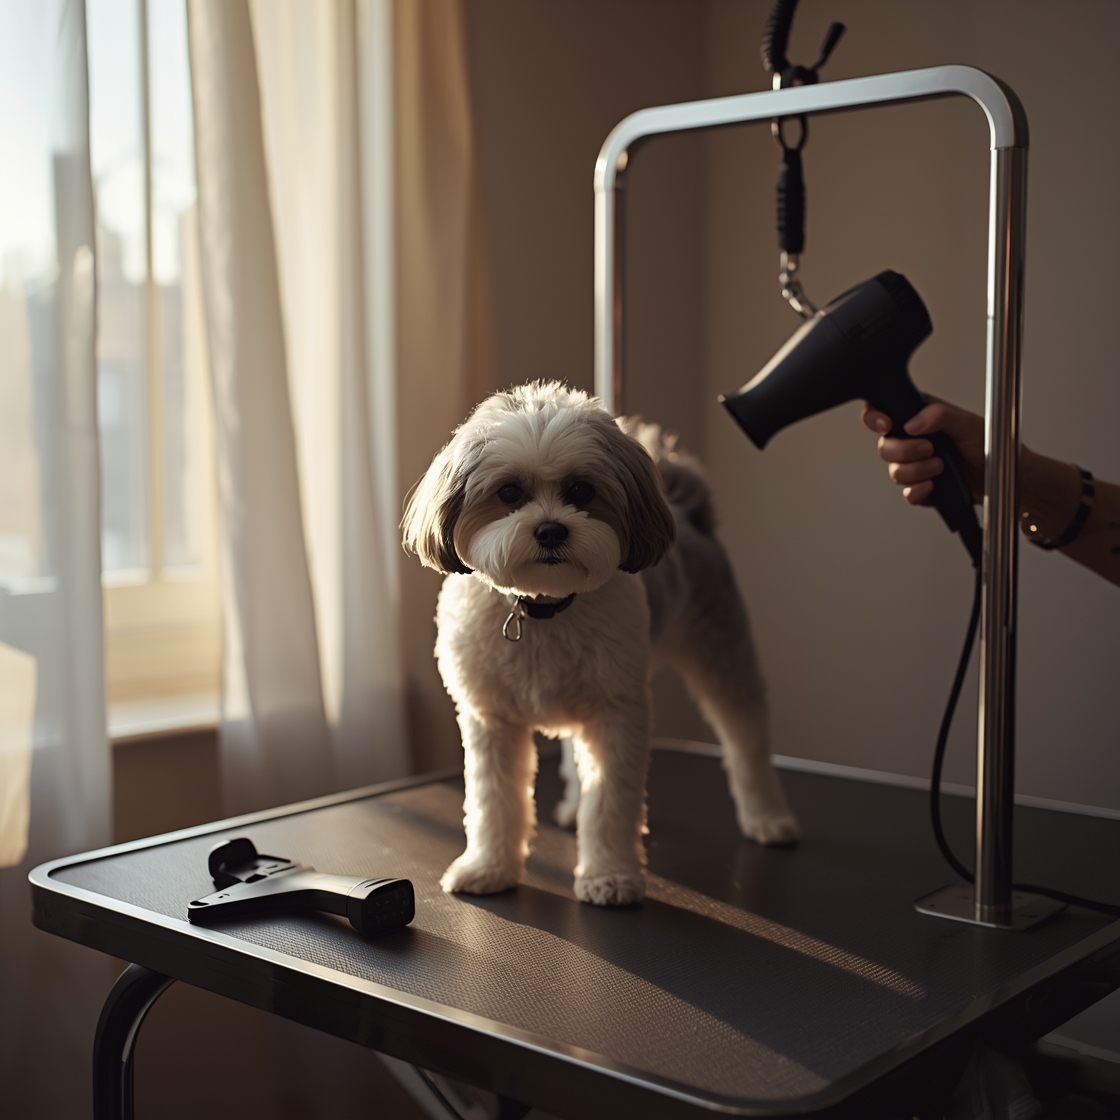
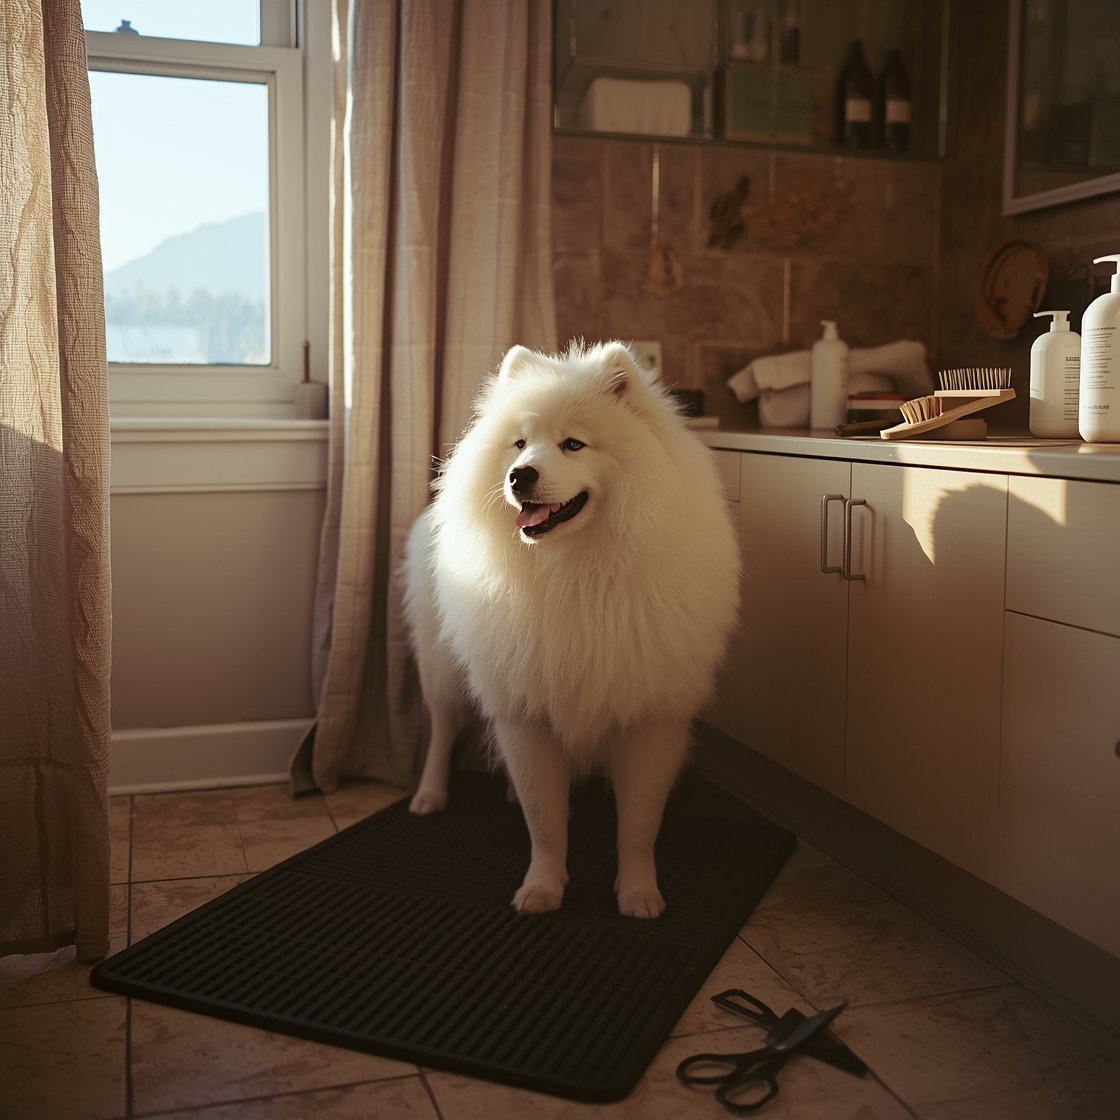
2. Bathing and Shampooing
Fill a tub or basin with lukewarm water—about 38 °C (100 °F) is ideal for most dogs. Wet the coat thoroughly, avoiding the eyes and ears, then apply a dog-specific shampoo formulated for your pet’s skin condition (e.g., oatmeal for sensitive skin). Lather gently, massaging the shampoo into the fur to reach the skin, then rinse completely to prevent residue buildup. Research suggests that bathing every 4–6 weeks maintains a healthy oil balance without stripping natural moisturizers. Pat the dog dry with a microfiber towel and, if the breed tolerates it, use a low-heat dryer on a gentle setting.
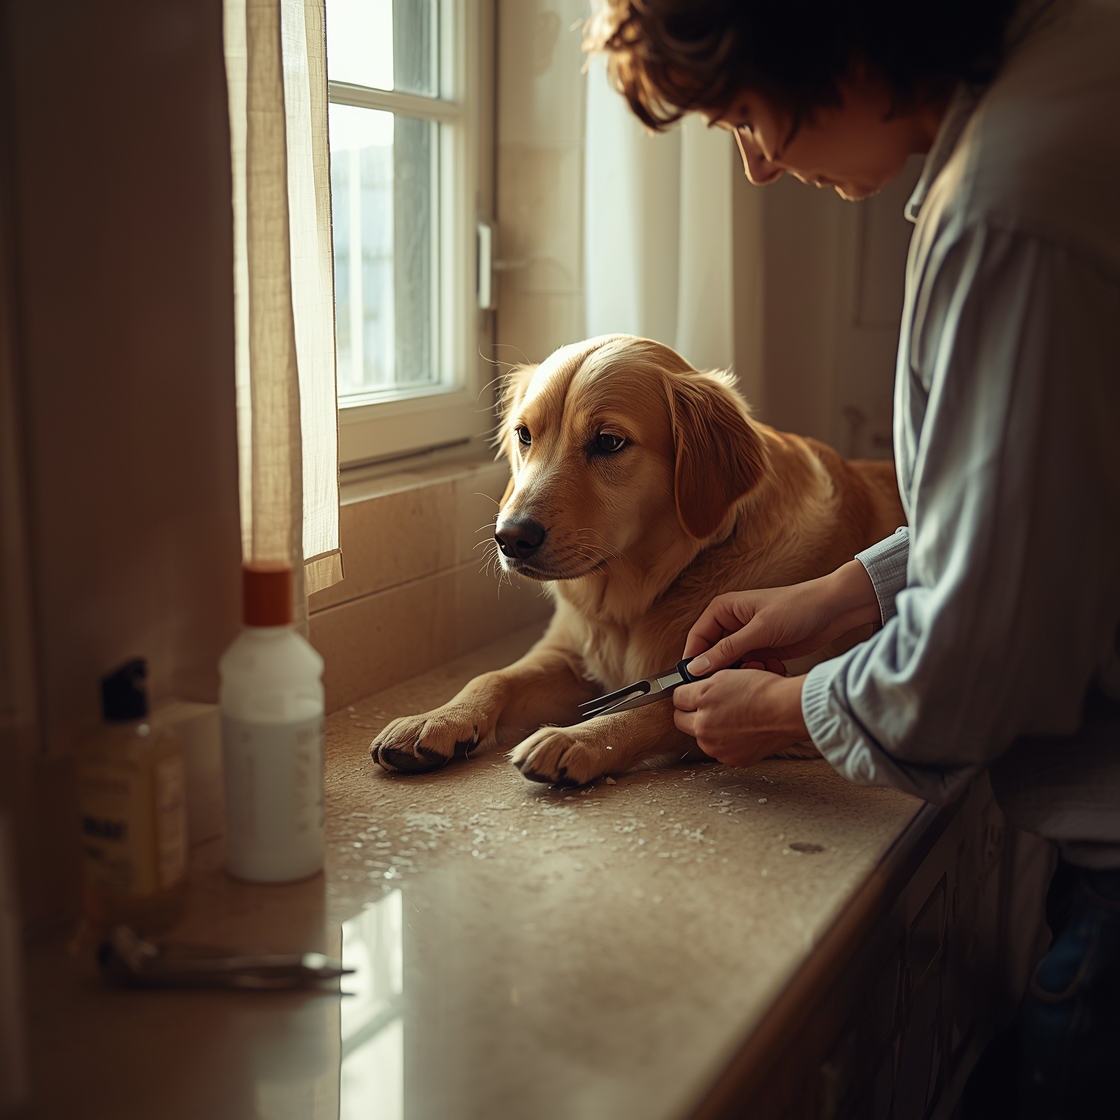
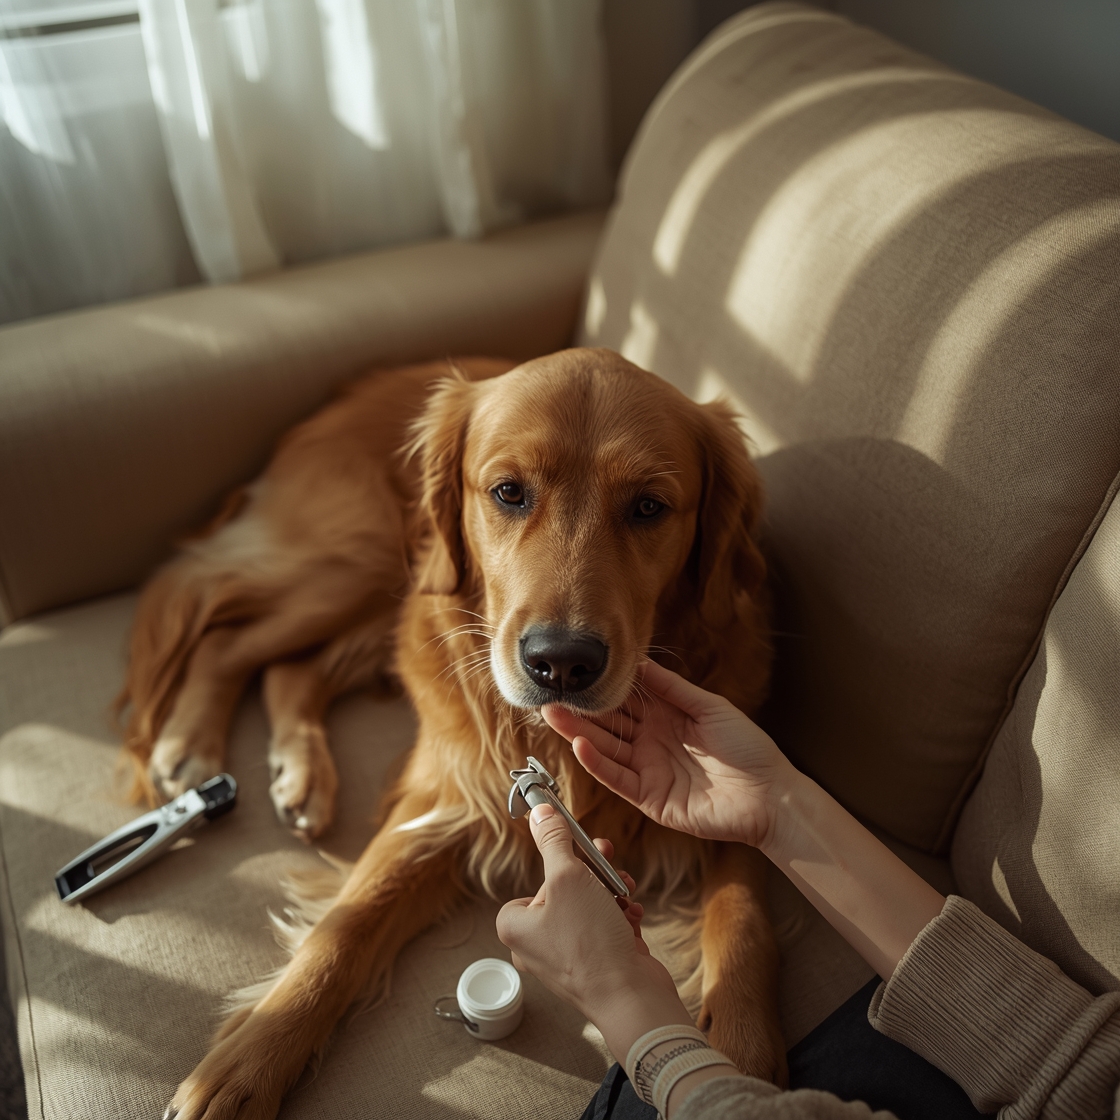
3. Nail Trimming and Grinding
Check nail length by pressing the pad; the quick—a pink line in light‑colored nails—should remain untouched. Trim only the tip with a sharp, scissor‑type nail clipper, taking off no more than 2 mm at a time. If you’re nervous about cutting the quick, a rotary grinder offers a safer, gradual reduction. Work in short bursts, and keep a styptic powder handy in case of accidental bleeding.
4. Ear Cleaning and Inspection
Hold the ear flap upright and examine the canal for wax, debris, or foul odor. Using a vet‑approved ear cleanser on a cotton ball, gently wipe the outer ear and the visible portion of the canal—never insert anything deep. Allow the dog to shake; this helps dislodge excess fluid. If you notice redness, swelling, or a strong smell, pause the grooming session and consult a veterinarian, as these can signal infection.
Following these four stages in order creates a smooth, stress‑free grooming routine that keeps your dog comfortable, healthy, and looking its best.
How to Groom a Dog with Clippers
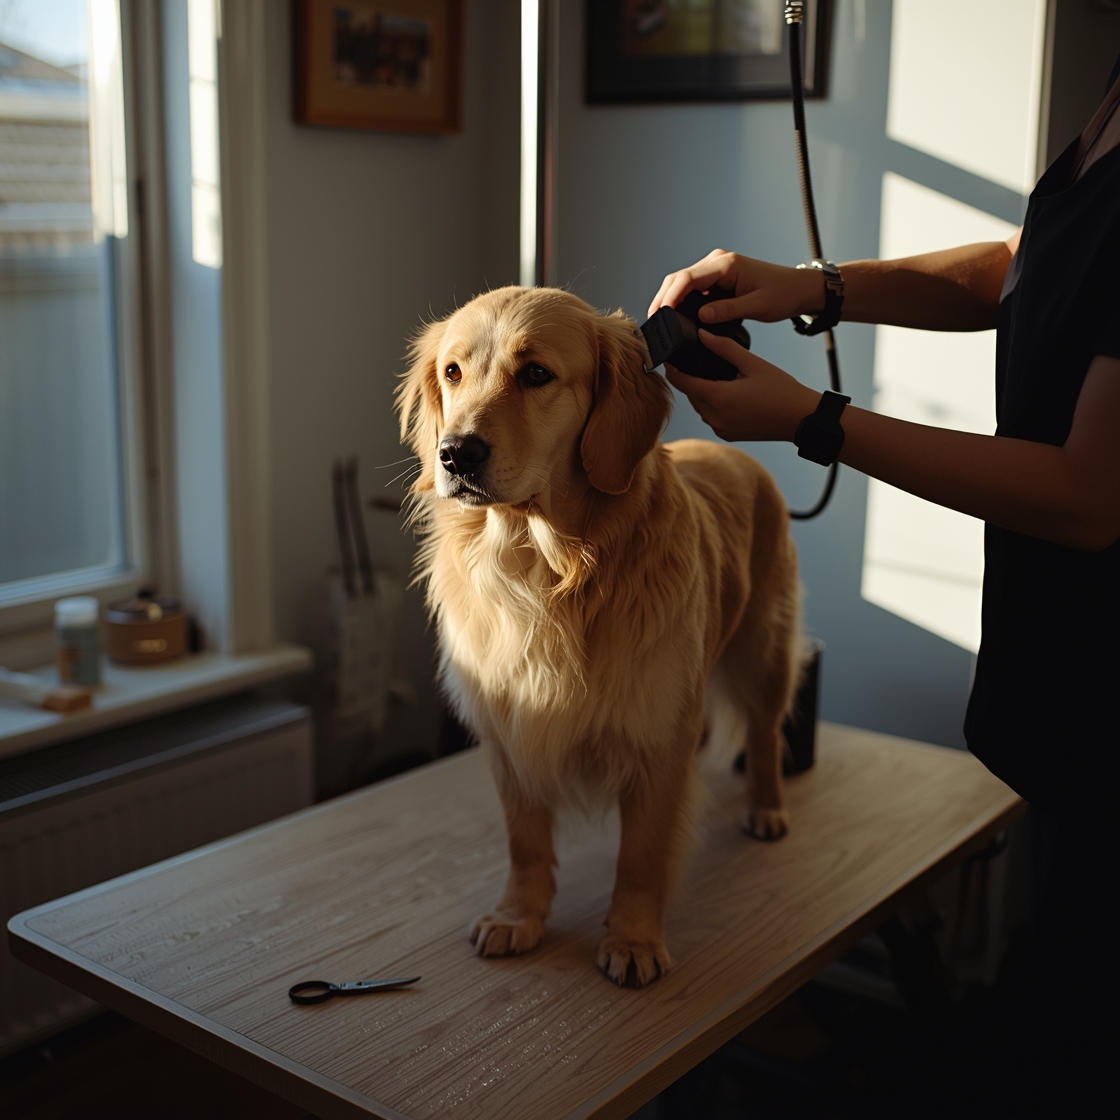
Choosing the right clippers starts with your dog’s coat type. Fine‑hair breeds such as the Maltese or Bichon Frise benefit from lightweight, rotary‑blade clippers that glide without pulling, while double‑coated or wiry coats like those of a Siberian Husky or a Wirehaired Terrier need more powerful, detachable‑blade models that can tackle dense fur without overheating. Look for a motor that offers at least 2,000 RPM and an adjustable blade guard so you can switch between lengths without swapping tools. A low‑vibration design also keeps nervous pups calmer during the session.
Before you fire up the clippers, prep your dog as you would for any grooming step. Begin with a thorough brush to eliminate tangles; clippers can snag on mats and cause skin irritation. Give your pet a short walk or a play break to burn off excess energy, then settle them on a non‑slippery surface. A quick wipe with a damp towel removes loose hair and helps the blades glide smoother. Many experts recommend a brief “warm‑up” pass on a less visible area—such as the underside of the neck—to let the motor reach optimal speed and to gauge your dog’s comfort level.
Clipping techniques vary across body zones. For the body and back, work with the grain of the hair, moving the clippers in long, overlapping strokes from the neck toward the tail. Keep the blade guard snug against the skin to avoid accidental nick‑n‑cuts. When tackling the legs, hold the paw gently and clip in the direction of hair growth, using a smaller blade guard for a tidy finish around pads and joints. The face and ears require the most delicacy; switch to a precision‑blade attachment or a pair of scissor‑type trimmers for areas around the eyes, muzzle, and ear canals. Always pause frequently, offering treats and praise to reinforce a positive experience.
Avoiding common pitfalls is crucial reports that owners typically make ten recurring grooming mistakes, many of which involve using the wrong clipper size or rushing the process, leading to uneven cuts or skin irritation. By selecting the appropriate clipper for your dog’s coat, preparing them calmly, and applying zone‑specific techniques, you’ll achieve a salon‑quality trim while keeping your pet comfortable and safe.
Grooming a Dog with Matted Hair
Matted coats aren’t just unsightly—they can hide skin irritation, trap moisture, and even lead to painful knots that pull on the skin. The first step is to recognize when a tangle has become a true mat: the hair will feel rope‑like, resist gentle pulling, and often create a raised lump that can be felt through the skin.
Identifying and Gently Working Out Mats
- Feel before you cut. Run your fingers through the coat, starting at the ends and working toward the root. If a section feels dense and doesn’t separate easily, you’re likely dealing with a mat.
- Soften the hair. Lightly dampen the area with a spray bottle of lukewarm water or a conditioning spray designed for dogs. Moisture makes the fibers more pliable and reduces the risk of pulling.
- Loosen with your fingers. Use a “finger‑comb” technique—place your thumb and forefinger on either side of the knot and gently tease the strands apart. Patience is key; a sudden tug can cause skin tears.
If the mat is particularly stubborn, work on it in small sections. A pair of blunt‑ended scissors can be used to carefully cut the hair outside the knot, never directly into the mat, to avoid accidental cuts.
Using the Right Tools for Matted Hair
- Mat splitter or dematting comb. These have wide, spaced teeth that can separate tangled hair without excessive force.
- Slicker brush. Ideal for fine to medium coats; the fine bristles glide through loose tangles before they tighten.
- Pin brush. Works well on longer coats, helping to lift the hair and reveal hidden knots.
- Detangling spray or conditioner. A canine‑safe formula adds slip, making the combing process smoother.
According to grooming guides that outline common pitfalls, there are ten frequent dog‑grooming mistakes owners make, and tackling mats with the wrong tool tops that list 【.com】.
Preventing Matting in the Future
- Regular brushing. For most breeds, a daily or at‑least‑every‑other‑day brushing session keeps hair from intertwining.
- Trim problem areas. Areas prone to matting—behind the ears, under the legs, and the belly—benefit from a light trim every few months.
- Maintain coat health. A balanced diet rich in omega‑3 fatty acids supports a glossy, less‑tangled coat.
- Use a grooming schedule. Set reminders for brush‑outs, baths, and coat checks; consistency beats occasional deep‑clean sessions.
By spotting mats early, employing the proper tools, and establishing a routine, you’ll keep your dog’s coat comfortable, healthy, and knot‑free.
How Often Should You Groom Your Dog?
The right grooming cadence depends on what coat your dog has, how active they are, and any health quirks they may show. In general, most owners find a monthly brush‑and‑bathe routine works well, but tailoring the schedule to your pet’s specific needs keeps the coat healthy and reduces skin problems.
Factors that influence grooming frequency
| Factor | Why it matters | Typical adjustment |
|---|---|---|
| Coat type | Double‑coated breeds (e.g., Siberian Husky, Golden Retriever) shed heavily and can develop mats, while short‑haired dogs shed less. | Double coats usually need brushing 2–3 times a week and a full bath every 4–6 weeks; short coats can be brushed once a week and bathed every 8–12 weeks. |
| Lifestyle | Dogs that spend most of the day outdoors pick up dirt, pollen, and parasites faster than indoor‑only pets. | Outdoor dogs often require more frequent nail trims and weekly brushing to remove debris. |
| Health conditions | Skin allergies, seborrhea, or hormonal issues can cause excess oil or flakiness, demanding extra care. | When a skin condition is present, a gentle bath every 2–3 weeks and daily spot‑cleaning may be necessary. |
Recommended grooming schedules by breed group
- Double‑coated breeds – Brush 2–3 times weekly; full bath and deep‑conditioner every 4–6 weeks. pawvortex.com advises this interval to prevent matting and manage seasonal shedding.
- Long‑haired, single‑coat breeds (e.g., Shih Tzu, Lhasa Apso) – Daily brushing to avoid tangles; bath every 4–8 weeks.
- Short‑haired breeds (e.g., Beagle, Boxer) – Brush once a week; bath every 8–12 weeks unless they get especially dirty.
- Hairless or minimal‑coat dogs (e.g., Chinese Crested) – Focus on skin moisturization and nail trims every 3–4 weeks; bathing once a month to keep skin oils balanced.
Seasonal adjustments
Winter often means less outdoor exposure, so you can stretch bathing intervals a bit, but the dry air may dry out the skin, prompting occasional moisturizing baths. In spring and summer, shedding peaks for many breeds; increasing brushing to daily and scheduling an extra bath can keep loose hair from clogging the house and reduce the risk of hot‑spot infections..com notes that dogs with heavy outdoor activity may benefit from weekly baths during hot months to wash off pollen and mud.
Bottom line: Start with a baseline monthly grooming routine, then tweak brushing, bathing, and nail‑trimming frequency based on coat type, activity level, health status, and the season. Regular observation of your dog’s skin and coat will tell you when you need to step up or back off.
Common Dog Grooming Mistakes to Avoid
One of the easiest ways to keep grooming sessions pleasant for both you and your dog is to sidestep a handful of pitfalls that many beginners fall into. Critternets.com outlines ten frequent errors, and avoiding them can prevent skin irritation, coat damage, and unnecessary stress. Below are the three most consequential categories and how to correct them.
Using the Wrong Tools or Techniques
Grabbing a human‑style brush, a blunt nail clipper, or a low‑quality shampoo may feel convenient, but these items are not designed for a dog’s thicker coat, tougher nails, or sensitive skin. A slick, rubber‑handled brush can pull out tangled fur, while an overly aggressive clipper blade can nick the skin. The guide on pawvortex.com recommends investing in a stainless‑steel clipper set with adjustable blades, a slicker brush suited to your dog’s coat type, and a pH‑balanced dog shampoo. Test each tool on a small area first; if you notice pulling, redness, or a strong odor, swap it out for a gentler alternative.
Over‑ or Under‑Grooming
Both extremes cause problems. Grooming too often—especially heavy brushing or frequent baths—can strip natural oils, leaving the skin dry and flaky. Conversely, neglecting regular brushing lets mats form, which can pull at the skin and hide parasites..com notes that most breeds benefit from a weekly brush and a bath every four to six weeks, but the exact schedule should be tailored to coat length, activity level, and seasonal shedding. Keep a grooming log to track frequency and adjust as your dog’s needs change.
Ignoring Potential Health Issues
Grooming is an ideal time to spot early warning signs, yet many owners rush through the process and miss them. Skin redness, unusual lumps, or foul‑smelling ears can indicate infections, allergies, or even more serious conditions. emphasizes that overlooking these cues can turn a minor problem into a veterinary emergency. During each session, run your fingers along the spine, check the ears for debris, and examine the paws for cracks or thickenings. If anything looks out of the ordinary, pause the grooming routine and consult a veterinarian before proceeding.
By selecting appropriate tools, finding the right grooming cadence, and treating each session as a health check, you’ll keep your dog comfortable, healthy, and looking his best.
Frequently Asked Questions

How long does it take to groom a dog at home?
The time required varies widely with breed, size, and coat type. A short‑haired small dog can be bathed, brushed, and have its nails trimmed in roughly 15‑20 minutes, while a large, double‑coated breed may need 45‑60 minutes to complete the same steps without rushing. For beginners, puppysimply.com breaks the process into three core stages—bath, brush, and nail care—so planning for at least half an hour for a medium‑sized dog is a realistic starting point.
Can I groom my dog if they have sensitive skin?
Yes. Dogs with delicate skin benefit from gentle, hypo‑allergenic shampoos, soft‑bristle brushes, and low‑heat drying. Using a cotton‑based towel to pat dry and avoiding harsh chemicals reduces irritation. pawvortex.com recommends testing any new product on a small patch of skin first and watching for redness or itching before proceeding with a full grooming session.
What basic tools do I need for a safe home grooming routine?
A minimal kit includes a dog‑appropriate shampoo, a slicker brush or bristle brush matched to the coat, nail clippers or a grinder, and a non‑slip mat for the bathtub. Adding a pair of ear‑cleaning wipes and a grooming glove can make the experience smoother, especially for nervous pets. According to happygroomerhq.com, assembling these essentials before you start helps keep the session organized and reduces stress for both you and your dog.
How often should I groom my dog at home?
Frequency depends on coat length and activity level. Short‑haired breeds generally need a quick brush once a week and a bath every 4‑6 weeks. Long‑haired or actively outdoor dogs may require brushing several times a week and baths every 2‑3 weeks to prevent matting and keep skin healthy. Regular nail checks—about once a month—prevent overgrowth and discomfort.
What are common mistakes to avoid when grooming at home? Common pitfalls include using tools that are too harsh for your dog’s coat, trimming nails too short (which can cause bleeding), and rushing through the process, which can increase anxiety. critternets.com warns that neglecting to dry the ears properly can lead to infections, and.com highlights the importance of keeping the grooming area well‑ventilated to avoid buildup of shampoo residue. Taking a calm, methodical approach and following a step‑by‑step guide helps you sidestep these errors.
Conclusion and Final Tips
Grooming your dog at home doesn’t have to feel like a daunting chore. When you break the process into the five core steps—brushing the coat, bathing, drying, trimming nails, and cleaning ears—you’ll cover everything a healthy pup needs. Each step builds on the previous one: a thorough brush removes tangles that can trap shampoo, while a gentle ear wipe prevents infections that often arise from moisture left after a bath. Remember to use a soft‑bristled brush for short coats, a slicker brush for longer fur, a dog‑specific shampoo, a non‑slip mat for bathing, a nail grinder or clipper designed for pets, and cotton‑based ear wipes.
Patience and practice are the real secret ingredients. The first few sessions may be a little messy, and your dog might be hesitant, but consistency pays off. According to PawVortex, their 2025 guide outlines four main grooming stages and emphasizes that owners who stick with a regular routine notice calmer behavior and shinier coats within weeks. Treat each grooming session as a short, positive interaction—keep it under 15 minutes for beginners, reward with treats, and use calm, reassuring tones. Over time, both you and your dog will learn the rhythm, reducing stress and making the whole experience smoother.
If you’re still on the fence, think of grooming as an extension of daily bonding. Starting with a simple brush‑out once a week can boost your dog’s comfort level, and you’ll quickly gain confidence to add baths and nail trims. The tools are inexpensive, the steps are straightforward, and the payoff—healthier skin, fewer matting issues, and a stronger owner‑pet connection—is priceless. So set aside a quiet spot, gather your basic grooming kit, and give it a try this weekend. Your dog will thank you with wagging tails and a glossy coat, and you’ll discover that home grooming is both doable and rewarding.
Article Update Log
Last reviewed: May 2026. If you spot something out‑of‑date, let us know.
- Initial publication.
Our editorial team treats this guide as a living document, revisiting it at least twice a year or whenever a major shift in grooming best practices emerges. We track three primary signals that trigger an update:
- New research or industry guidelines – When veterinary associations or reputable pet‑care sites release fresh data—such as the latest recommendations on safe nail‑trimming angles or coat‑type‑specific brushing frequencies—we cross‑check those findings against our current steps.
- Tool and product evolution – Advances in grooming equipment (e.g., quieter rotary clippers, antimicrobial brush materials) are monitored through manufacturer releases and consumer‑review aggregators. If a new class of tool demonstrably improves safety or efficiency, we add a brief note and adjust the “essential tools” list.
- Reader feedback and error reports – Comments, emails, and social‑media mentions are logged in a shared spreadsheet. Recurrent questions—like “how often should I clean the ear canal?”—prompt a clarification or an extra tip in the relevant section.
During each review cycle we audit the article against a checklist of 12 criteria, ranging from factual accuracy to readability score. Any statistic we cite is re‑verified; for instance, the “ten common dog grooming mistakes” we outline aligns with the count presented by both and Critternets, which each enumerate ten pitfalls for owners (; Critternets).
When a change is warranted, we record the date, the nature of the amendment, and the source that prompted it. This transparent log helps readers see the evolution of the guide and reassures them that the advice reflects the most current consensus.
Looking ahead, we plan to incorporate a “seasonal grooming checklist” once the 2025‑focused guide from Pawvortex.com releases its next edition, ensuring our recommendations stay aligned with upcoming trends and climate‑related coat care needs.